power xl air fryer oven manual

Power XL Air Fryer Oven Manual: A Comprehensive Guide

This manual provides essential guidance for operating your Power XL Air Fryer Oven (Model CM001)‚ ensuring safe and optimal performance for delicious results every time.

Welcome to the world of effortless cooking with your new Power XL Air Fryer Oven! This innovative appliance combines the benefits of convection cooking with rapid air circulation‚ delivering crispy‚ flavorful results with little to no oil. This manual serves as your comprehensive guide to unlocking the full potential of your kitchen companion.

The Power XL Air Fryer Oven is designed for household use‚ offering a versatile cooking solution for a wide range of dishes – from perfectly golden French fries to succulent roasted meats. Before your first use‚ please carefully review the safety precautions and instructions outlined in this manual to ensure safe operation and optimal performance. Get ready to experience a healthier and more convenient way to enjoy your favorite foods!

Understanding Your Model: CM001 Specifications

Your Power XL Air Fryer Oven‚ model CM001‚ is engineered for efficient and versatile cooking. It operates on a standard AC 120V‚ 60Hz power supply‚ drawing a rated power of 1700W. The temperature range spans from 150°F to 400°F (65°C ⏤ 200°C)‚ providing precise control for various recipes.

The intuitive LED touch screen allows for easy operation and monitoring of cooking settings. This model features a convenient Rotation function for even cooking and browning. It’s designed to accommodate included accessories like the Roasting Dish and Air Flow Racks‚ enhancing its functionality. Familiarizing yourself with these specifications will help you maximize the performance and longevity of your new appliance.

Safety Precautions & Important Warnings

Prior to using your Power XL Air Fryer Oven‚ carefully review these crucial safety guidelines. This appliance is intended for household use only. Always ensure the unit is properly grounded and connected to a 120V‚ 60Hz outlet. Never operate the fryer without reading the complete manual.

Avoid immersing the unit or power cord in water. Hot surfaces pose a burn risk – use oven mitts when handling accessories or food. Do not operate the appliance if the cord or plug is damaged. Keep the air fryer away from flammable materials. Unplug the unit when not in use and before cleaning. Failure to follow these warnings could result in injury or damage.

Getting Started with Your Air Fryer

Begin by carefully unboxing your Power XL Air Fryer Oven and preparing it for initial use‚ following the setup instructions detailed within this guide.

Unboxing and Initial Setup

Carefully remove your Power XL Air Fryer Oven from its packaging‚ ensuring all components are present. Verify you have the unit itself‚ the air flow racks‚ and the roasting dish. Inspect for any visible damage that may have occurred during shipping; if damage is present‚ contact customer support immediately.

Before first use‚ thoroughly wash the air flow racks and roasting dish with warm‚ soapy water. Wipe down the interior and exterior of the air fryer oven with a damp cloth. It is crucial to remove any packaging materials or residue before operation. Place the unit on a stable‚ heat-resistant surface with adequate ventilation. Familiarize yourself with the placement of the air flow racks within the unit‚ as proper positioning is vital for optimal cooking performance.

Power Supply Requirements (120V‚ 60Hz‚ 1700W)

The Power XL Air Fryer Oven is designed for use with a standard 120-volt‚ 60-hertz electrical outlet. It requires a power supply of 1700 watts. Ensure your outlet provides sufficient power to avoid tripping breakers or damaging the unit. Do not use extension cords or adapters unless absolutely necessary‚ and if used‚ ensure they are rated for at least 1700 watts.

Improper voltage or frequency can cause malfunction or damage. Always verify the voltage matches the appliance’s requirements before plugging it in. Avoid using the air fryer oven with a damaged power cord or plug. If the power cord is damaged‚ it must be replaced by the manufacturer‚ its service agent‚ or similarly qualified persons to avoid hazard. Never operate the appliance near water or in a damp environment.

Control Panel Overview: LED Touch Screen Functions

The Power XL Air Fryer Oven features an intuitive LED touch screen control panel for effortless operation. This panel displays temperature settings ranging from 150°F to 400°F (65°C ⏤ 200°C) and allows precise time adjustments for various cooking needs. Use the touch controls to select pre-programmed cooking functions or customize settings manually.

The screen clearly indicates the remaining cooking time and selected temperature. Dedicated buttons control power‚ start/pause‚ and rotation functions. Familiarize yourself with the icons for common functions like fries‚ roast‚ and reheat. A responsive touch interface ensures accurate input and easy navigation. Refer to the detailed function guide within this manual for a complete understanding of each control’s purpose.

Using the Accessories

Maximize your cooking potential with included accessories like air flow racks and a roasting dish‚ strategically placed for optimal air circulation and versatile recipes.

Air Flow Racks: Proper Placement & Usage

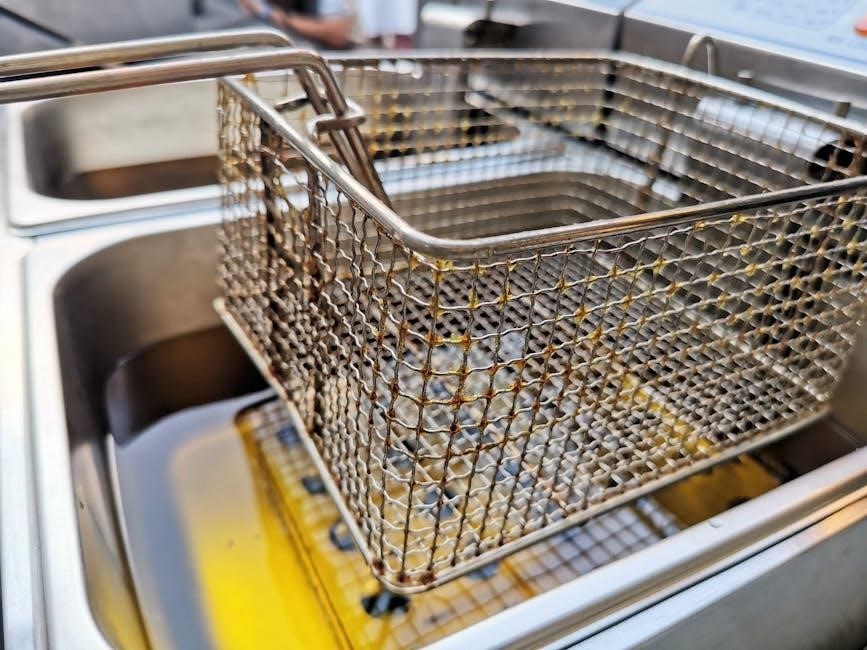
Achieving optimal cooking results with your Power XL Air Fryer Oven relies heavily on the correct placement and usage of the air flow racks. These racks are designed to promote even heat circulation around your food‚ ensuring crispy exteriors and thoroughly cooked interiors. Always place the racks directly into the designated slots within the unit‚ ensuring they are securely seated before operation.

For best results‚ avoid overcrowding the racks; allow sufficient space between food items to facilitate proper airflow. This prevents steaming and promotes even browning. When cooking multiple batches‚ consider staggering the racks or rotating them midway through the cooking process for consistent results. Remember to always refer to your recipe for specific rack placement recommendations‚ as certain foods may benefit from different configurations.

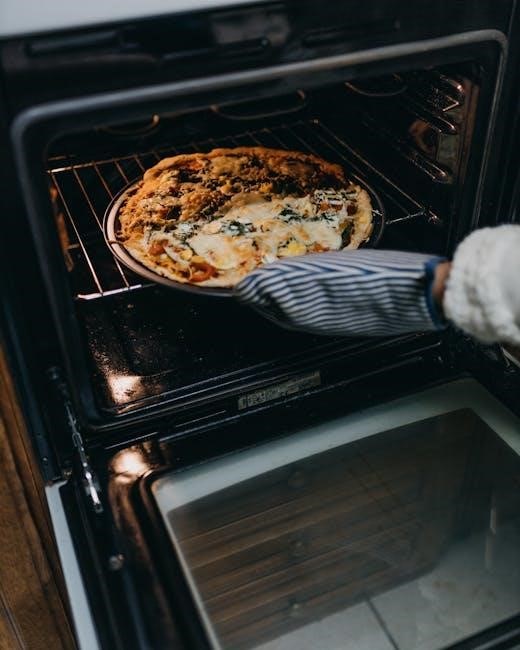
Roasting Dish: Utilizing for Different Recipes

The included roasting dish expands the versatility of your Power XL Air Fryer Oven‚ enabling a wider range of culinary creations beyond traditional air frying. This dish is ideal for roasting vegetables‚ baking small desserts‚ or even cooking whole chickens‚ offering a convenient alternative to conventional ovens.

When utilizing the roasting dish‚ ensure it’s properly centered within the air fryer oven for even heat distribution. For recipes involving liquids or sauces‚ consider lining the dish with parchment paper for easier cleanup. The dish’s durable construction allows for high-temperature cooking‚ but always adhere to the recommended temperature settings (150°F ⎻ 400°F) outlined in your recipe. Experiment with different recipes to discover the full potential of this valuable accessory!

Cooking with Your Power XL Air Fryer Oven

Explore diverse cooking possibilities with precise temperature control (150°F ⏤ 400°F) and adjustable time settings‚ achieving perfectly cooked meals effortlessly.

Temperature Settings: 150°F ⎻ 400°F (65°C ⎻ 200°C)

The Power XL Air Fryer Oven offers a versatile temperature range‚ spanning from 150°F (65°C) to 400°F (200°C). Lower temperatures are ideal for gentle cooking‚ slow cooking‚ or warming foods without over-browning. Utilize the mid-range (200°F ⏤ 300°F) for baking‚ roasting vegetables‚ and preparing delicate proteins like fish.

For achieving crispy exteriors and thoroughly cooked interiors‚ especially with favorites like french fries or chicken‚ employ the higher temperature settings (300°F ⎻ 400°F). Remember that cooking times will vary depending on the selected temperature and the quantity of food. Always consult recipes for recommended temperature guidelines‚ and adjust as needed to suit your preferences. Experimenting within this range allows you to customize your cooking experience and achieve optimal results.

Time Settings & Preheating

The Power XL Air Fryer Oven’s intuitive control panel allows for precise time settings‚ crucial for perfectly cooked dishes. Cooking times depend heavily on the recipe and food quantity; always refer to recommended guidelines as a starting point. The timer function enables hands-free operation‚ automatically shutting off the unit upon completion.

While not always mandatory‚ preheating the air fryer oven – typically for 3-5 minutes – is recommended‚ especially when cooking foods requiring a crispy texture. Preheating ensures even cooking and optimal results. The LED touch screen clearly displays the remaining cooking time‚ providing real-time monitoring. Adjust cooking times as needed based on your observations and desired level of doneness.

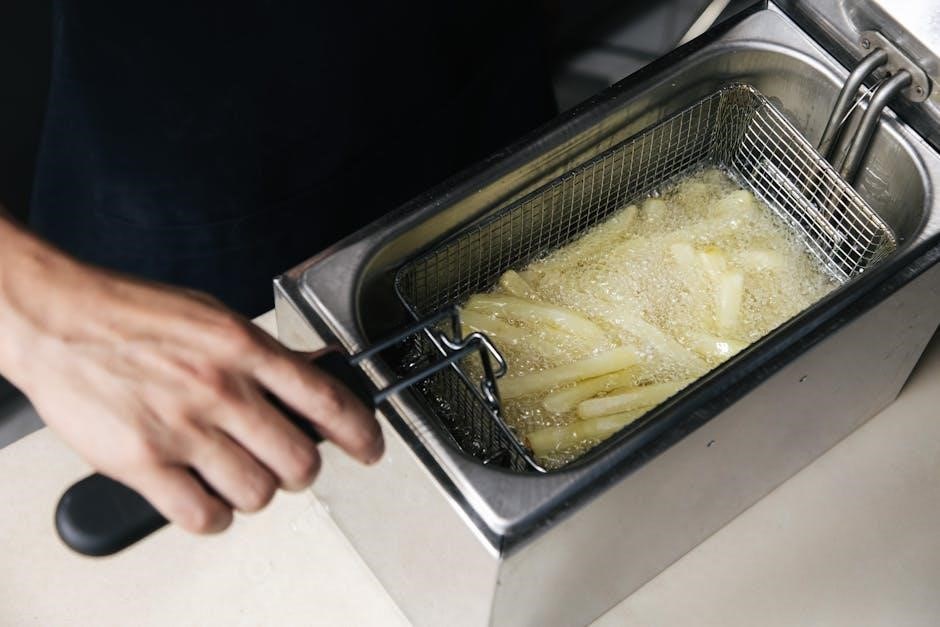
Cooking Common Foods: French Fries & Roasting

The Power XL Air Fryer Oven excels at preparing popular dishes like French fries and roasted meats with minimal oil. For crispy French fries‚ toss frozen fries with a small amount of oil and arrange in a single layer on the air flow rack. Cook at 400°F (200°C) for 15-20 minutes‚ shaking halfway through.

Roasting chicken or vegetables is equally simple. Season your food‚ place it in the roasting dish‚ and cook at 375°F (190°C) for the recommended time based on weight. Utilizing the rotation function ensures even browning and cooking throughout. Experiment with temperature and time to achieve your preferred level of crispness and doneness.

Maintenance and Cleaning

Regular cleaning ensures longevity and optimal performance of your Power XL Air Fryer Oven. Many parts are dishwasher safe‚ simplifying the cleaning process significantly.

Dishwasher Safe Parts

Convenience is key with the Power XL Air Fryer Oven‚ and that extends to cleaning! Several components are designed to be safely washed in your dishwasher‚ saving you valuable time and effort. Specifically‚ the roasting dish and air flow racks are both dishwasher safe. However‚ always ensure these parts are secured properly on the top rack to prevent movement during the wash cycle and potential damage.

Avoid using harsh abrasive cleaners or scouring pads‚ as these can damage the non-stick coating of the roasting dish and the finish of the racks. For heavily soiled items‚ a pre-soak in warm‚ soapy water can help loosen food residue before placing them in the dishwasher. Remember to check your dishwasher’s manual for compatibility and recommended settings. While dishwasher safe‚ handwashing can prolong the life of these accessories.

Cleaning the Unit: Interior & Exterior

Maintaining a clean Power XL Air Fryer Oven is crucial for optimal performance and longevity. Always unplug the unit and allow it to cool completely before cleaning. The interior should be wiped down after each use to remove food splatters and grease buildup. Use a soft‚ damp cloth and mild dish soap. Avoid abrasive cleaners‚ as they can damage the interior coating.

For the exterior‚ simply wipe down with a damp cloth. Stubborn stains may require a slightly stronger cleaning solution‚ but always test in an inconspicuous area first. Never immerse the unit in water or any other liquid. Ensure the heating element is free from debris. Regular cleaning prevents smoke and odors during future cooking sessions‚ keeping your air fryer in top condition for years to come.

Troubleshooting Common Issues

If your Power XL Air Fryer Oven isn’t heating‚ ensure it’s properly plugged into a functioning 120V outlet. Check the timer setting – it may not be activated. If food isn’t cooking evenly‚ try rotating the food during the cooking process using the rotation function‚ or rearranging the air flow racks for better circulation. Smoke during operation often indicates excessive grease buildup; clean the unit thoroughly.

For error messages on the LED touch screen‚ consult the full manual for specific code definitions. If the unit shuts off unexpectedly‚ it may be overheating; allow it to cool before restarting. Always prioritize safety and avoid attempting repairs yourself; contact customer support for assistance with complex issues.

Advanced Features & Tips

Unlock superior cooking with the rotation function‚ ensuring even crisping and browning. Maximize airflow by not overcrowding the racks for optimal results!

Rotation Function: Benefits & Usage

The Power XL Air Fryer Oven’s rotation function is a game-changer for achieving consistently crispy and evenly cooked food. Unlike traditional convection ovens‚ this feature actively rotates the food during the cooking process‚ eliminating the need for manual flipping or rearranging. This ensures that all sides of your dishes are exposed to the hot‚ circulating air‚ resulting in uniform browning and texture.

To utilize the rotation function‚ simply select the ‘Rotate’ option on the LED touch screen control panel before starting your cooking cycle. It’s particularly beneficial for foods that require thorough cooking‚ such as whole chickens‚ roasts‚ or even batches of french fries. Experiment with different rotation settings to find what works best for your favorite recipes. Remember‚ consistent rotation leads to consistently delicious outcomes!

Maximizing Airflow for Crispy Results

Achieving that signature crispy texture with your Power XL Air Fryer Oven relies heavily on maximizing airflow. Proper food placement is crucial; avoid overcrowding the air flow racks‚ as this restricts circulation and leads to steaming instead of frying. Ensure there’s space between each item to allow hot air to reach all surfaces evenly.

Utilizing the air flow racks correctly is also key. Position them appropriately within the unit‚ following recipe guidelines‚ to facilitate optimal air movement. For best results‚ lightly coat food with oil – but don’t overdo it! – to promote browning and crisping. Remember‚ consistent airflow is the secret to perfectly cooked‚ delightfully crispy meals every time.

7 on 7 flag football plays no blocking pdf

7-on-7 flag football emphasizes passing skills and strategic play-calling, often utilizing readily available PDF playbooks for efficient team coordination and game planning.

What is 7-on-7 Flag Football?

7-on-7 flag football is a fast-paced, non-contact version of American football, focusing heavily on passing and receiving skills. Unlike traditional football, there’s no blocking allowed, which dramatically alters the strategic landscape. This format typically involves seven players per side, emphasizing agility, route running, and accurate throws.

Defenses concentrate on coverage and rushing the quarterback, while offenses prioritize quick reads and precise passing concepts. Many teams utilize PDF playbooks to organize and implement their strategies, providing visual diagrams and detailed explanations of each play. These playbooks are crucial for teaching players formations, routes, and defensive responsibilities, enhancing team cohesion and execution on the field.

Why Use a Playbook (PDF)?

A PDF playbook is essential in 7-on-7 flag football due to the game’s complexity and speed. Without blocking, precise timing and coordinated routes are paramount. A well-structured playbook provides a centralized resource for all offensive and defensive schemes, ensuring every player understands their role.

PDF format allows for easy distribution, viewing on multiple devices, and clear visual diagrams of plays. It facilitates efficient practice sessions, enabling coaches to quickly teach and refine strategies. Furthermore, a playbook promotes consistency in terminology and execution, fostering better communication and teamwork. Utilizing a playbook maximizes a team’s potential in this skill-based, strategic sport.

Offensive Formations

Offensive formations in 7-on-7 are crucial for creating passing lanes and exploiting defensive weaknesses, often detailed visually within a team’s PDF playbook.

Single Receiver Formations

Single receiver formations are foundational in 7-on-7, prioritizing quick reads and isolating matchups. These sets often feature a lone receiver split wide, demanding precise route running and accurate throws from the quarterback. A PDF playbook will illustrate variations like the “Gun Empty – Single Receiver Left” or “Shotgun – Single Right,” detailing receiver routes – hitches, outs, and slants – designed for immediate gains.

These formations are effective for teams seeking to stretch the field horizontally and vertically, forcing the defense to cover significant ground. The PDF should also include notes on potential adjustments based on defensive coverage, such as audibles to quick passing concepts if the receiver is heavily guarded. Simplicity and execution are key with single receiver sets.

Single Back Spread

The Single Back Spread in 7-on-7 utilizes one running back positioned behind the quarterback, creating a balanced look while emphasizing the passing attack. A detailed PDF playbook will showcase route combinations designed to exploit coverage weaknesses, such as a receiver running a deep “go” route while another executes a quick “out.” This formation allows for quick throws and utilizes the running back as a check-down option.

Playbooks should diagram variations with different receiver alignments and route trees. The spread aspect forces the defense to cover more ground, creating opportunities for one-on-one matchups. Effective execution relies on precise timing and the quarterback’s ability to read the defense pre-snap and post-snap, as illustrated within the PDF.

Empty Backfield

The Empty Backfield formation in 7-on-7 removes the running back, deploying five potential receivers to stretch the defense horizontally and vertically. A comprehensive PDF playbook will detail passing concepts specifically designed for this look, such as “Mesh” routes or quick-hitting slant patterns. This formation demands a quick-thinking quarterback capable of rapid reads and accurate throws.

Playbooks should illustrate how to identify and exploit defensive coverages. The absence of a running back necessitates a strong emphasis on pass protection and route running. Variations within the PDF might include different receiver splits and motion to create confusion. This aggressive approach aims to overwhelm the defense with receiving threats.

Multiple Receiver Formations

Multiple Receiver Formations are staples in 7-on-7, maximizing passing options and stressing defensive coverage. A detailed PDF playbook is crucial for organizing these sets, showcasing formations like “Trips” (three receivers to one side) and “Quads” (four receivers to one side). These formations force defenses to declare their coverage and create favorable matchups.

The PDF should include plays designed to exploit these imbalances, utilizing quick passes, deep routes, and route combinations. Understanding receiver positioning and route timing is paramount. These formations often require pre-snap reads to identify blitzes or coverage rotations. Effective playbooks will also detail adjustments based on defensive responses, ensuring offensive flexibility.

Trips Formation

The Trips Formation, a cornerstone of 7-on-7 offense, features three receivers aligned to one side of the field. A comprehensive PDF playbook must detail plays specifically designed to leverage this overload, creating advantageous matchups and stressing zone coverage. Common plays include quick slants to the inside receiver, deep “go” routes from the outside receiver, and “wheel” routes from the slot.

The PDF should illustrate route combinations that attack different areas of the field, forcing the defense to choose which receiver to prioritize. Pre-snap reads are vital to identify coverage schemes and adjust the play accordingly. Variations include motioning a receiver to create further confusion and exploit defensive weaknesses.

Quad Formation

The Quad Formation in 7-on-7 maximizes receiving threats, aligning four receivers to one side. A detailed PDF playbook is crucial for exploiting the resulting defensive imbalances. Plays should focus on quick reads and decisive throws, capitalizing on the overload. Route concepts like “levels” – short, intermediate, and deep routes – create layered passing options.

Your PDF must showcase plays designed to attack both the sideline and the middle of the field. Utilizing screens to the quad side can also be effective. Pre-snap adjustments are key; identify potential blitzes and adjust routes accordingly. This formation demands precise timing and accurate throws to overwhelm the defense.

Passing Concepts

Passing concepts are vital in 7-on-7, detailed in a PDF playbook, focusing on route combinations and timing to exploit defensive weaknesses effectively.

Short Passing Game

Short passing is foundational in 7-on-7, offering quick completions and minimizing risk, crucial elements detailed within a comprehensive PDF playbook. These plays prioritize accuracy and receiver’s ability to gain yards after the catch (YAC).

Slant routes provide immediate targets, requiring precise throws and quick receiver reactions. Quick outs are effective against aggressive coverage, demanding timing and accurate ball placement. A well-designed PDF playbook will illustrate these routes with clear diagrams and coaching points. Mastering these short routes builds offensive rhythm and keeps the defense honest, preventing them from solely focusing on deep threats. Successful execution relies on consistent practice and understanding route depths and receiver releases.

Slant Routes

Slant routes are a cornerstone of the 7-on-7 short passing game, detailed effectively in a PDF playbook with diagrams illustrating precise receiver angles and quarterback timing. Receivers aim for a quick inside cut, creating separation and a fast, reliable target.

Successful slant routes demand accurate throws, hitting the receiver in stride. Quarterbacks must anticipate the defender’s leverage and deliver the ball quickly. A PDF playbook should emphasize footwork drills for both the QB and receiver. Variations include single and double slants, creating confusion for the defense. Mastering this route requires repetition and understanding of spacing concepts, maximizing YAC potential and quick gains.

Quick Outs

Quick outs are essential for a 7-on-7 offense, providing a rapid release option and exploiting defensive over-pursuit, clearly illustrated within a comprehensive PDF playbook. Receivers execute a sharp break towards the sideline, aiming to create immediate separation from the defender;

A well-executed quick out requires precise route running and accurate quarterback placement. The PDF playbook should detail proper footwork and timing. Variations include option routes, allowing receivers to adjust based on coverage. This play is effective against aggressive man coverage and can quickly move the chains. Mastering the quick out demands consistent practice and understanding of defensive tendencies, offering a reliable short-yardage option.

Intermediate Passing Game

The intermediate passing game in 7-on-7 focuses on routes that develop between 10-20 yards, demanding timing and accuracy, all detailed within a strategic PDF playbook. These routes exploit the space between the short and deep coverage zones, requiring quarterbacks to read defenses quickly.

A successful intermediate game relies on concepts like curl routes and dig routes (in routes). The PDF playbook should illustrate route depths and break points. Quarterbacks must anticipate receiver movements and deliver the ball with anticipation. These plays are crucial for sustaining drives and keeping the defense honest, offering a balance between short and deep threats.

Curl Routes

Curl routes are foundational in the intermediate passing game of 7-on-7, detailed effectively within a PDF playbook. Receivers run a short route, typically 10-15 yards, then sharply break back towards the quarterback. This route attacks the space vacated by defenders dropping into coverage.

A well-executed curl route requires precise timing and a quick release from the quarterback, as illustrated in the PDF playbook diagrams. The quarterback must read the defender’s leverage and throw the ball to the outside shoulder of the receiver. Variations include inside and outside curls, adding complexity. Mastering this route is vital for consistent gains.

Dig Routes (In Routes)

Dig routes, also known as in routes, are crucial for attacking the middle of the field in 7-on-7, and are clearly outlined in a comprehensive PDF playbook. The receiver runs a vertical route for a specified distance (typically 12-18 yards) before sharply cutting inside towards the center of the field.

A successful dig route relies on the receiver’s ability to create separation from the defender and the quarterback’s accuracy. The PDF playbook should detail proper route depth and timing. Quarterbacks must anticipate the defender’s reaction and deliver a quick, accurate throw. This route is effective against zone and man coverage, offering a reliable intermediate option.

Deep Passing Game

The deep passing game in 7-on-7 relies on exploiting single coverage and a quarterback’s arm strength, all detailed within a well-structured PDF playbook. These plays aim to stretch the field vertically, creating opportunities for big gains. A PDF playbook will illustrate route combinations designed to stress the defense.

Successful deep throws require precise timing and accuracy. Receivers must have the speed to get behind the coverage and the hands to secure the catch. The playbook should emphasize pre-snap reads and post-snap adjustments. Common deep routes include Go routes and Post routes, each with specific techniques for maximizing effectiveness.

Go Routes (Fly Routes)

Go routes, also known as fly routes, are the quintessential deep threat in 7-on-7, meticulously diagrammed within a comprehensive PDF playbook. These routes demand a receiver’s exceptional speed and the quarterback’s ability to deliver an accurate, long-distance pass. The playbook details proper stem techniques, aiming for a direct path towards the endzone.

Effective execution requires the receiver to quickly release off the line of scrimmage and maintain speed throughout the route. Quarterbacks must lead the receiver, anticipating their speed and the defender’s positioning. A PDF playbook will showcase variations, like outside or inside releases, to counter different coverages and exploit defensive weaknesses.

Post Routes

Post routes are crucial deep-passing concepts in 7-on-7, detailed within a well-structured PDF playbook. Unlike a ‘go’ route’s direct path, the post involves an initial inside move, then a sharp break towards the goalposts. This route aims to exploit the space between the safety and cornerback, requiring precise timing and route running.

A PDF playbook illustrates variations – quick posts for faster releases, or delayed posts to draw defenders closer. Quarterbacks must anticipate the receiver’s break and deliver the ball over the defender’s head, leading the receiver into open space. Successful post routes often rely on play-action or pre-snap reads to influence the defense.

Running Plays (Limited in 7-on-7)

7-on-7 minimizes running, but PDF playbooks may include QB draws or delayed handoffs to keep defenses honest and add unpredictability.

QB Draw Play

The QB draw play in 7-on-7 flag football is a deceptive tactic designed to exploit aggressive pass rushes. Unlike traditional football, the absence of a traditional offensive line necessitates a quick, decisive execution. A PDF playbook should detail the snap count and the quarterback’s initial dropback mimicking a pass play.

However, instead of immediately throwing, the quarterback pulls the ball down and runs through the vacated space. Success relies on convincing the defense it’s a pass, creating hesitation. Diagrams within the PDF should illustrate receiver routes designed to sell the pass, and the quarterback’s running lane. This play is most effective when the defense is anticipating a deep throw, offering a surprising change of pace.

Delayed Hand-Offs

Delayed hand-offs, though less common in 7-on-7 flag football due to its pass-centric nature, can be effective surprise elements. A detailed PDF playbook must clearly illustrate timing and receiver responsibilities. The quarterback initially fakes a pass, holding the ball for a beat or two longer than usual, drawing the defense’s attention.

Then, a quick, underhand toss is made to a receiver who’s flared out or running a short route. The PDF should emphasize the importance of misdirection and the receiver’s ability to secure the catch and immediately turn upfield. This play works best against defenses overly focused on pass coverage, exploiting their aggressive positioning and creating open running lanes for a quick gain.

Special Plays & Trickery

Special plays, detailed in a PDF playbook, introduce unpredictability to 7-on-7, utilizing screens and reverses to exploit defensive positioning and gain yardage.

Screen Passes

Screen passes are highly effective in 7-on-7 due to the absence of a traditional offensive line; a PDF playbook should detail various screen concepts. These plays rely on quick releases and receiver agility to exploit aggressive pass rushes. A well-executed screen involves delaying the pass slightly, allowing defenders to penetrate, then quickly releasing the ball to a receiver positioned behind the line of scrimmage.

Different screen variations – running back screens, wide receiver screens, and even tight end screens – should be included in the playbook. Diagrams should clearly illustrate receiver routes, quarterback footwork, and potential blocking angles (using pre-snap receiver positioning to create lanes). Successful screens require precise timing and receiver awareness to navigate the open field and gain significant yardage, often turning short gains into substantial plays.

Reverse Plays

Reverse plays add an element of surprise to a 7-on-7 offense, capitalizing on defensive pursuit angles; a comprehensive PDF playbook must illustrate these effectively. These plays involve a handoff in one direction, then a quick pitch back to a receiver running in the opposite direction. Successful reverses require precise timing, ball-handling skills, and deceptive blocking schemes – utilizing receiver movements to create confusion.

The playbook should detail different reverse variations, including receiver-to-receiver reverses and even quarterback-to-receiver reverses. Diagrams should clearly show the initial handoff point, the pitch-back location, and the intended running lane. Proper execution relies on misdirection and exploiting over-aggressive defensive ends. A well-timed reverse can create significant gains and disrupt the defensive flow, offering a valuable change of pace.

Defensive Strategies to Counter Plays

Defensive schemes, like zone and man-to-man coverage, are crucial for disrupting offenses; a PDF playbook details adjustments to counter common passing concepts effectively.

Zone Coverage Schemes

Zone coverage in 7-on-7 relies on defenders covering specific areas of the field rather than individual receivers. Cover 2 utilizes two deep safeties, protecting against deep passes and forcing shorter routes, often detailed in a PDF playbook. This scheme requires strong communication to avoid coverage busts.

Cover 3 employs three deep defenders, offering more flexibility against varied route combinations. A well-diagrammed PDF will illustrate zone responsibilities and potential weaknesses. Successfully executing zone coverage demands disciplined defenders who understand route recognition and can quickly adjust to the quarterback’s reads. These schemes are vital for limiting big plays in a no-blocking environment.

Cover 2 Zone

Cover 2 is a foundational zone defense in 7-on-7, featuring two deep safeties splitting the field into halves. This formation excels at preventing deep completions, a crucial aspect in no-blocking flag football. A detailed PDF playbook should illustrate safety responsibilities and cornerback techniques for underneath coverage.

Cornerbacks in Cover 2 typically “flat” cover, defending quick routes to the sidelines, while linebackers fill the intermediate zones. Effective communication is paramount to avoid confusion. A PDF diagram should highlight potential vulnerabilities, like the “hole” between the corner and safety, and how to defend against it. Mastering Cover 2 requires disciplined zone awareness.

Cover 3 Zone

Cover 3 is a versatile zone defense in 7-on-7, employing three deep defenders to cover the field. A comprehensive PDF playbook should detail each defender’s zone responsibility, emphasizing quick reads and efficient communication. This coverage is effective against both short and intermediate routes, but can be vulnerable to attacks in the flat.

Cornerbacks typically cover deep thirds, while the middle safety patrols the central portion of the field. Linebackers fill the underneath zones, reacting to receiver routes. A well-designed PDF should illustrate how to adjust to different offensive formations and identify potential weaknesses. Successful Cover 3 execution relies on disciplined zone coverage and swift reactions.

Man-to-Man Coverage

Man-to-Man coverage in 7-on-7 demands athletic defensive backs capable of staying stride-for-stride with receivers. A detailed PDF playbook must outline techniques for jamming at the line, mirroring receiver routes, and locating the football. This scheme excels at disrupting timing and preventing easy completions, but requires exceptional individual skill.

Effective man coverage necessitates consistent pressure on the quarterback. The PDF should include drills to improve footwork, backpedaling, and break points. Safeties provide over-the-top help, anticipating deep routes. Communication is crucial; defenders must alert each other to potential rubs or pick plays. Success hinges on individual matchups and relentless pursuit.

Press Man Coverage

Press Man is an aggressive 7-on-7 technique where defenders line up directly at the line of scrimmage, attempting to disrupt the receiver’s route. A comprehensive PDF playbook must detail proper hand placement, footwork for jamming, and quick recovery skills. This coverage aims to throw receivers off their timing and force quicker throws into tighter windows.

The PDF should emphasize the importance of controlled aggression – avoiding penalties while still being physical. Defensive backs need excellent agility to redirect receivers and maintain coverage downfield. Safeties must provide deep support, anticipating “go” routes. Successful press man requires precise technique, quick reflexes, and a thorough understanding of receiver releases.

Flat Coverage

Flat Coverage in 7-on-7 focuses on defending quick passes to the sidelines, a common tactic in no-blocking schemes. A detailed PDF playbook should illustrate how cornerbacks aggressively funnel receivers towards the middle of the field, supported by linebackers or safeties “squatting” on the flats. This prevents easy completions for short yardage.

The PDF must highlight the importance of quick reaction times and disciplined pursuit angles. Defenders need to avoid over-pursuing and leaving gaps in coverage. Communication is key – alerting teammates to potential routes. Safeties provide deep help, preventing deep throws over the top. Effective flat coverage disrupts the timing of quick passing attacks and forces longer developing routes.

Playbook PDF Considerations

A successful PDF playbook for 7-on-7 requires clear diagrams, concise play terminology, and practice drills to reinforce concepts, enhancing team understanding and execution.

Diagramming Plays Effectively

Visual clarity is paramount when diagramming 7-on-7 plays within your PDF playbook. Utilize consistent symbols for receivers, the quarterback, and defensive players. Arrows should clearly indicate route directions and timing. Color-coding routes – for example, short, intermediate, and deep – enhances quick comprehension.

Consider including multiple views of each play: a full-field perspective and close-ups highlighting receiver alignments and route details. Numbering routes sequentially aids in coaching and player communication.

Since 7-on-7 eliminates blocking, focus diagrams on passing lanes and receiver-defender matchups. Avoid clutter; simplicity promotes faster learning. Ensure diagrams are scalable without losing detail, accommodating various screen sizes for easy access during practice or game day review. A well-designed diagram is a cornerstone of effective playbook implementation.

Key Play Terminology

A consistent glossary within your 7-on-7 PDF playbook is crucial for clear communication. Define terms like “slant,” “dig” (in route), “go” (fly route), and “quick out” precisely. Explain route depths – short, intermediate, deep – and receiver responsibilities. Include terms for formations, such as “Trips” or “Empty Backfield.”

Since blocking is absent, emphasize terminology related to passing concepts and receiver-defender interactions. Define terms for coverage beats and route adjustments.

Standardize language for play calls; avoid ambiguity. A shared understanding of terminology minimizes miscommunication on the field, fostering quicker execution and improved team cohesion. Regularly review terminology during practice to reinforce comprehension and ensure everyone is on the same page.

Practice Drills to Reinforce Plays

To effectively implement your 7-on-7 playbook (PDF), dedicate practice time to specific drills. Run “route trees” focusing on precise route running and timing with the quarterback. Implement “7-on-7 skelly” drills – QB vs. Receivers vs. Defensive Backs – to isolate passing concepts.

Incorporate drills emphasizing quick reads and decision-making for the quarterback. Defensive drills should focus on coverage techniques and flag-pulling form.

Repetition is key! Run plays repeatedly at game speed. Simulate game scenarios to build situational awareness. Regularly assess player understanding and adjust drills accordingly, ensuring mastery of each play within the playbook.

Resources for Playbooks

Online databases and coaching clinics offer valuable 7-on-7 playbooks (PDF) and insights. Workshops provide hands-on learning for effective implementation and strategy.

Online Playbook Databases

Numerous websites curate and offer 7-on-7 flag football playbooks in PDF format, providing coaches with a wealth of options. These databases often categorize plays by formation, route combinations, and defensive counters, streamlining the playbook selection process.

Many platforms allow coaches to filter plays based on skill level and team personnel, ensuring the playbook aligns with their athletes’ capabilities. Some databases feature user-submitted plays, fostering a collaborative environment for sharing innovative strategies.

Accessing these resources typically requires a subscription or one-time purchase, but the investment can significantly enhance a team’s offensive and defensive schemes. Remember to evaluate the playbook’s complexity and ensure it suits your team’s understanding and execution abilities. Prioritize playbooks specifically designed for no-blocking 7-on-7 rules.

Coaching Clinics & Workshops

Attending coaching clinics and workshops focused on 7-on-7 flag football provides invaluable, hands-on learning experiences. These events often feature experienced coaches sharing their playbooks – frequently available in PDF format – and demonstrating effective implementation strategies.

Workshops delve into the nuances of no-blocking schemes, emphasizing route running, quarterback decision-making, and defensive coverage techniques. Networking opportunities allow coaches to exchange ideas and build relationships with peers.

Clinics often include film study sessions, dissecting successful and unsuccessful plays to enhance understanding. Investing in professional development through these avenues ensures coaches stay current with evolving strategies and can effectively utilize playbooks to maximize their team’s potential. Look for clinics specifically addressing the unique challenges of 7-on-7.

mixing station manual

Mixing Station is a powerful application gaining traction amongst live sound engineers‚ offering extensive UI customization and remote control capabilities.

This manual details setup‚ advanced features like unlimited DCAs‚ and workflow techniques for controlling multiple consoles efficiently.

Mixing Station Anywhere extends this functionality‚ providing reliable remote mixing performance mirroring the standard application experience.

What is Mixing Station?

Mixing Station represents a significant leap forward in digital audio control‚ evolving from tools like Director to become a favored application within the live sound community. It’s fundamentally a software solution designed to provide engineers with comprehensive‚ customizable control over their mixing consoles – and now‚ multiple consoles simultaneously.

Initially‚ users appreciated its full UI customization options‚ allowing for tailored layouts optimized for various devices‚ including vertical phone configurations for quick access to essential functions. Beyond basic control‚ Mixing Station unlocks advanced features previously unavailable‚ such as unlimited DCAs (Virtual Control Associations) for nuanced level management across numerous channels.

Its capabilities extend to MIDI controller integration‚ offering tactile control‚ and crucially‚ the ability to manage up to eleven console lines from four different manufacturers. This versatility positions Mixing Station as a central hub for complex audio setups‚ streamlining workflows and enhancing control for professional sound reinforcement.

The Core Functionality of Mixing Station

At its heart‚ Mixing Station functions as a remote control surface for digital mixing consoles‚ translating user input into console commands. This extends beyond simple fader adjustments; it encompasses comprehensive control over channel parameters‚ routing‚ and effects. A key feature is its ability to manage complex ingredient chains – essential in scenarios requiring multiple mixers.

The clipboard functionality is central to this‚ enabling engineers to configure output routing between stations sequentially. For instance‚ a seven-ingredient mix utilizes seven stations‚ with the clipboard directing the signal flow from one to the next.

Furthermore‚ Mixing Station’s core strength lies in its adaptability. Whether operating locally or remotely via Mixing Station Anywhere‚ the functionality remains consistent‚ providing a familiar and reliable experience. This parity ensures seamless transitions between environments‚ empowering engineers with consistent control regardless of location.

Setting Up Your Mixing Station

Initial configuration involves connecting to your chosen console‚ ensuring network compatibility for Mixing Station Anywhere‚ and verifying supported manufacturers like Behringer.

Proper setup unlocks the app’s full potential.

Initial Configuration and Device Connections

Connecting to your mixer is the first crucial step. Mixing Station supports a growing list of digital consoles‚ and establishing a stable connection is paramount for seamless control. Ensure your mixing console and the device running Mixing Station are on the same network.

The application will automatically scan for compatible devices. Follow the on-screen prompts to select your console from the list. You may need to input the console’s IP address manually if auto-discovery fails. Verify that the console’s network settings allow communication from the Mixing Station device.

For optimal performance‚ a wired Ethernet connection is recommended‚ especially for critical live sound applications. Wireless connections can be used‚ but signal strength and stability should be carefully monitored. Once connected‚ calibrate the application to match your console’s channel configuration for accurate control and monitoring.

Supported Consoles and Manufacturers

Mixing Station boasts compatibility with a diverse range of professional digital mixing consoles‚ continually expanding its reach. Currently‚ the application offers robust control over consoles from four major manufacturers‚ including support for the popular Ui series. This allows engineers to leverage the app’s advanced features across different setups.

Specific models supported include those from leading brands known for their reliability and performance in live sound environments. The developers are actively working to add support for additional consoles based on user demand and technical feasibility.

Functionality varies slightly between consoles‚ with features like unlimited DCAs (VCAs) being particularly beneficial for certain models. Check the official Mixing Station website for the most up-to-date list of supported consoles and their respective feature sets.

Networking Requirements for Mixing Station Anywhere

Mixing Station Anywhere relies on a stable and secure network connection for optimal performance. A consistent internet connection is paramount for remote mixing‚ ensuring minimal latency and reliable control. Both the control device (phone‚ tablet‚ or computer) and the mixing console must be connected to the internet.

A wired Ethernet connection is recommended for the console to provide the most stable link. For remote control devices‚ a strong Wi-Fi signal is essential. Consider network bandwidth; higher bandwidth supports smoother operation‚ especially when controlling multiple console lines simultaneously.

Firewall configurations may need adjustment to allow communication between the Mixing Station application and the console. Refer to the Mixing Station documentation for specific port requirements and troubleshooting tips to ensure seamless remote access.

User Interface and Customization

Mixing Station boasts full UI customization‚ allowing engineers to create tailored layouts for various gigs and preferences‚ including vertical and landscape configurations.

This adaptability enhances workflow and accessibility‚ especially when utilizing mobile devices for live sound control.

Full UI Customization Options

Mixing Station truly shines with its comprehensive UI customization features‚ empowering users to design interfaces perfectly suited to their individual workflows and gig requirements. Beyond simple re-arrangements‚ the application allows for granular control over element placement‚ sizing‚ and visibility.

Users can create dedicated layouts for different scenarios – a streamlined phone-based interface for quick adjustments‚ or a detailed landscape view for complex mixes. The ability to prioritize frequently used functions‚ like channel pages and essential controls (SoF)‚ is a significant benefit.

This level of personalization extends to visual elements‚ enabling a comfortable and efficient mixing experience. The flexibility to adapt the UI ensures that Mixing Station remains a powerful tool‚ regardless of the mixing environment or device used;

Creating Custom Layouts for Different Gigs

Mixing Station’s adaptability is maximized through its layout creation tools‚ allowing engineers to pre-configure interfaces tailored to specific event types. Whether managing a corporate presentation or a live music performance‚ dedicated layouts streamline the mixing process.

The application supports both vertical and landscape orientations‚ offering distinct advantages depending on the device and mixing style. A compact vertical layout is ideal for mobile devices‚ prioritizing essential controls for quick access. Conversely‚ a landscape configuration provides ample space for detailed channel views and complex routing.

Saving multiple layouts ensures a seamless transition between gigs‚ eliminating the need for constant re-configuration and maximizing efficiency. This feature is a cornerstone of Mixing Station’s workflow optimization.

Vertical vs. Landscape UI Configurations

Mixing Station offers remarkable flexibility with its support for both vertical and landscape user interface configurations‚ catering to diverse mixing scenarios and device preferences. Vertical mode excels on smartphones‚ prioritizing essential functions like channel pages and solo/mute controls in a streamlined‚ easily accessible format.

Landscape orientation‚ conversely‚ unlocks a broader canvas‚ ideal for tablets and larger screens. This allows for more detailed channel strip views‚ expanded metering‚ and complex routing configurations. Engineers can effectively manage numerous parameters simultaneously.

The choice depends on the gig’s complexity and the engineer’s workflow. Quick‚ simple setups benefit from vertical compactness‚ while intricate mixes thrive in landscape’s spaciousness.

Advanced Features and Techniques

Mixing Station unlocks powerful control through unlimited DCAs (VCAs)‚ MIDI controller integration‚ and the ability to manage multiple console lines simultaneously.

These features elevate mixing precision and efficiency for experienced audio professionals.

Utilizing Unlimited DCAs (VCAs)

Mixing Station fundamentally changes gain control with its implementation of unlimited DCAs (Digital Control Associates)‚ often referred to as VCAs (Voltage Controlled Amplifiers). Traditionally‚ consoles limit the number of available DCAs‚ forcing engineers to make compromises in grouping and control.

This limitation is removed within Mixing Station‚ allowing for incredibly granular control over individual elements and complex subgroups within a mix. Imagine dedicating a DCA to every drum element‚ vocal harmony‚ or even specific frequency ranges – the possibilities are extensive.

Single faders can then control multiple channel levels‚ streamlining adjustments during live performance. This is particularly beneficial when working with consoles like the Ui series‚ where this functionality expands the console’s inherent capabilities. The ability to create and assign DCAs dynamically adapts to the specific needs of each gig‚ offering unparalleled flexibility.

MIDI Controller Integration

Mixing Station elevates control beyond touchscreen interfaces through robust MIDI controller integration. This feature unlocks a tactile and familiar mixing experience for engineers accustomed to traditional hardware.

Connecting a MIDI controller allows for hands-on adjustment of faders‚ knobs‚ and buttons directly mapped to Mixing Station’s parameters. This provides a more intuitive workflow‚ especially during live performances where precise and rapid adjustments are crucial.

Custom mapping is a key component‚ enabling users to tailor the controller’s layout to their specific needs and preferences. Control virtually any aspect of the mix‚ from channel levels and EQ to effects sends and DCA assignments. This integration transforms Mixing Station into a powerful‚ hybrid mixing solution‚ blending the flexibility of software with the feel of hardware.

Controlling Multiple Console Lines

Mixing Station distinguishes itself with the ability to simultaneously control up to eleven different console lines‚ sourced from four distinct manufacturers. This groundbreaking feature streamlines workflows for complex setups and large-scale events.

Previously a limitation‚ this capability expands the application’s versatility‚ particularly for consoles like the Ui series‚ unlocking functionality such as unlimited DCAs (VCAs) and enhanced layout customization. Engineers can manage multiple mixers from a single interface‚ reducing the need for constant switching between applications.

This centralized control simplifies monitoring and adjustment across the entire sound system‚ improving efficiency and responsiveness during live performances. It’s a significant advancement for professionals managing intricate audio configurations.

Workflow and Practical Applications

Mixing Station excels at managing complex mixes‚ supporting multiple mixers and ingredient-based station sequencing via clipboard functionality for efficient output routing.

This allows for streamlined control and precise configuration of audio signals across diverse setups.

Using Mixing Station with Multiple Mixers

Mixing Station truly shines when deployed across multiple mixing consoles simultaneously. The application’s architecture allows for seamless control‚ but requires a thoughtful approach to setup and workflow. If a mix demands a substantial number of ‘ingredients’ – representing individual audio sources or processing chains – you’ll need a corresponding number of mixing stations.

For example‚ a seven-input mix necessitates seven dedicated stations. The key to interconnectivity lies in the clipboard functionality. Configure the output of the first mixing station to feed the input of the second‚ and so on‚ creating a sequential chain. Each storage location should hold only one ingredient‚ ensuring clarity and organization throughout the process. This method facilitates complex routing and precise control over intricate audio landscapes.

Ingredient Management and Station Sequencing

Effective Mixing Station operation hinges on meticulous ingredient management and a logical station sequence. Each ‘ingredient’ represents a distinct audio element requiring individual processing or routing. Assigning each ingredient to a dedicated station ensures clarity and prevents signal conflicts. When utilizing multiple mixers‚ the sequencing of stations becomes paramount.

Think of it as an assembly line: the output of one station feeds directly into the input of the next. The clipboard functionality is crucial here‚ allowing you to define these connections with precision. Loading each storage location with a single ingredient streamlines the workflow and minimizes errors. This systematic approach is vital for complex mixes‚ guaranteeing a smooth and controlled audio experience.

Clipboard Functionality for Output Routing

Mixing Station’s clipboard is a cornerstone of its advanced routing capabilities‚ especially when working with multiple mixers. It allows you to copy and paste output configurations between stations‚ drastically reducing setup time and ensuring consistency; This is particularly useful when chaining stations together to create complex signal flows.

Imagine configuring the output of the first mixing station‚ then seamlessly replicating that setup to the second‚ third‚ and subsequent stations using the clipboard; This eliminates repetitive manual adjustments; The clipboard stores not just the destination‚ but also any associated processing parameters‚ maintaining signal integrity throughout the chain. Mastering this feature unlocks efficient and precise control over your entire audio system.

Remote Mixing with Mixing Station Anywhere

Mixing Station Anywhere delivers the full power of the standard application remotely‚ enabling engineers to mix from any location with reliable performance.

This feature maintains functionality parity‚ offering a consistent experience regardless of where you are mixing from.

Benefits of Remote Audio Mixing

Remote audio mixing‚ facilitated by Mixing Station Anywhere‚ unlocks a new level of flexibility and efficiency for audio professionals. Imagine the ability to address critical sound issues or make nuanced adjustments without physically being present at the venue – this is the power offered.

This capability is particularly valuable for situations where immediate on-site intervention is impractical or impossible‚ such as geographically dispersed events or when engineers need to support multiple shows simultaneously. It also allows for expert consultation from anywhere in the world‚ bringing specialized skills to any location.

Furthermore‚ remote mixing reduces travel costs and logistical complexities‚ contributing to a more sustainable and cost-effective workflow. The consistent functionality with the standard version ensures a seamless transition and minimizes the learning curve‚ making it a practical solution for both seasoned professionals and emerging engineers.

Functionality Parity with the Standard Version

Mixing Station Anywhere isn’t a stripped-down version; it’s designed to mirror the full capabilities of the original Mixing Station application. This commitment to parity ensures a consistent user experience‚ regardless of location. Engineers familiar with the desktop or tablet interface will find the remote functionality intuitive and readily accessible.

All core features‚ including custom layout configurations‚ unlimited DCAs (VCAs)‚ and MIDI controller integration‚ are fully supported in the remote environment. This eliminates the need to relearn a different system or compromise on control when working remotely.

The goal is to provide the same reliable performance and comprehensive control from any location‚ empowering engineers to deliver professional-quality audio mixes consistently‚ whether on-site or remotely. This seamless integration is a key differentiator.

Troubleshooting and Support

Mixing Station offers solutions for common issues‚ alongside extensive online resources. Dedicated support channels and the active Reddit community provide assistance.

Find FAQs‚ tutorials‚ and contact information for prompt help with any challenges encountered while using the application.

Common Issues and Solutions

Connectivity Problems: Ensure a stable network connection when using Mixing Station Anywhere. Verify router settings and firewall configurations‚ as these can often disrupt communication between the app and the console.

Console Compatibility: While Mixing Station supports multiple manufacturers‚ occasional compatibility hiccups may occur. Check the official documentation for supported models and firmware versions. Updating console firmware can often resolve these issues.

UI Responsiveness: Complex custom layouts with numerous elements can sometimes impact performance‚ especially on older devices. Simplify your layout or reduce the number of active controls to improve responsiveness.

MIDI Controller Mapping: Incorrect MIDI mapping can lead to unexpected behavior. Double-check your MIDI assignments within the app’s settings and ensure they align with your controller’s configuration.

Unexpected Crashes: Regularly update Mixing Station to benefit from bug fixes and performance improvements. If crashes persist‚ try clearing the app’s cache or reinstalling it.

Where to Find Additional Help and Resources

Official Website: The primary source for documentation‚ FAQs‚ and the latest software updates is the official Mixing Station website. Explore the support section for detailed guides and troubleshooting tips.

Reddit Community (r/livesound): Engage with fellow users on the r/livesound subreddit. This active community frequently discusses Mixing Station‚ sharing workflows‚ custom layouts‚ and solutions to common problems.

Manufacturer Forums: Check the forums of your console manufacturer (e.g.‚ Behringer‚ Soundcraft) for Mixing Station-specific threads and compatibility information.

YouTube Tutorials: Numerous video tutorials demonstrate Mixing Station’s features and functionalities. Search YouTube for “Mixing Station tutorial” to find helpful visual guides.

Direct Support: For personalized assistance‚ contact the Mixing Station support team directly through their website or email.

database design filetype:pdf

Database design, especially when incorporating PDF documents, requires careful planning and normalization to ensure data integrity and efficient retrieval․

Initial mapping of fields and relationships on a whiteboard is crucial, alongside exploring Object-Relational Mappers (ORMs) for security․

Understanding relational theory, as detailed in resources like CJ Date’s works, is vital for robust database structures and performance optimization․

Understanding the Importance of Database Design

Effective database design is paramount for any application handling data, but becomes critically important when dealing with complex document types like PDF files․ A well-structured database ensures data consistency, minimizes redundancy, and facilitates efficient querying and reporting․

Poorly designed databases lead to performance bottlenecks, data integrity issues, and increased maintenance costs․ Spending adequate time upfront mapping out fields and their relationships – visualizing how data connects in the real world – is a foundational step․ This clarifies table structures and the appropriate placement of foreign keys․

Normalization, a core principle, prevents data anomalies and ensures data accuracy․ Furthermore, considering security from the outset, potentially leveraging ORMs, mitigates risks like SQL injection, especially crucial for web applications․ A solid design is not merely about storing data; it’s about enabling its reliable and efficient use․

The Role of PDF Documents in Database Considerations

PDF documents introduce unique challenges to database design․ Unlike structured data, PDFs are often unstructured or semi-structured, requiring careful consideration for storage and retrieval․ Simply storing PDFs as binary large objects (BLOBs) limits searchability and analysis․

Effective strategies involve extracting metadata – author, date, keywords – and storing it in relational database fields․ This enables efficient filtering and organization․ For content-based searches, full-text indexing within the PDF is essential, often requiring external tools or database features․

Furthermore, managing PDF versions necessitates robust version control mechanisms within the database․ Considerations must also be given to storage capacity and file formats․ The choice between storing the PDF itself or a link to its location impacts performance and scalability․ Ultimately, integrating PDFs requires a hybrid approach combining relational data with document management techniques․

Phase 1: Conceptual Database Design

Conceptual design focuses on understanding entities, attributes, and relationships, crucial for representing PDF data and its associated metadata within the database structure;

Entity Relationship Diagrams (ERDs) ー A Core Concept

Entity Relationship Diagrams (ERDs) are fundamental to conceptual database design, visually representing the entities – the core objects like PDF documents, authors, or keywords – and their relationships․

ERDs help clarify how these entities interact; for example, a PDF document is authored by one or more authors, and may contain multiple keywords․ Careful consideration of these relationships is paramount․

Mapping fields on a whiteboard, as suggested, directly translates into defining entities and their attributes within the ERD; This initial step clarifies what data needs to be stored and how it connects, influencing table structures and foreign key placements․

A well-constructed ERD serves as a blueprint, ensuring a logical and efficient database schema capable of handling PDF-related data effectively․ It’s a vital step before moving to logical and physical design phases;

Identifying Entities and Attributes

Identifying entities involves pinpointing the core objects relevant to your PDF database – think PDF documents themselves, authors, categories, or even metadata like keywords and dates․ These become the ‘nouns’ of your database․

Once entities are defined, you must determine their attributes: the characteristics describing each entity․ For a PDF document, attributes might include filename, file size, upload date, author, and a unique identifier․

This process, often started with whiteboard mapping, directly impacts table design․ Each entity typically translates into a table, and attributes become the table’s columns․

Careful attribute selection is crucial; consider data types and potential relationships․ A well-defined entity-attribute structure forms the foundation for a normalized and efficient database capable of managing PDF data effectively․

Defining Relationships Between Entities

Establishing relationships between entities is paramount in PDF database design․ Consider how PDF documents relate to authors – a one-to-many relationship (one author can create many PDFs)․ Similarly, a PDF might belong to multiple categories, representing a many-to-many relationship․

These relationships are implemented using foreign keys, linking tables together․ For example, an ‘Authors’ table and a ‘PDFs’ table would be linked via an ‘AuthorID’ column in the ‘PDFs’ table․

Accurate relationship definition is vital for data integrity and efficient querying․ A well-structured relational model allows you to easily retrieve information like “all PDFs authored by X” or “all PDFs within category Y”․

Properly defining these connections, initially visualized on a whiteboard, ensures a robust and scalable database for managing PDF documents and their associated data․

Phase 2: Logical Database Design

Logical design focuses on normalization – 1NF, 2NF, 3NF – to minimize redundancy and ensure data consistency when storing PDF metadata․

Normalization Principles (1NF, 2NF, 3NF)

Normalization is a cornerstone of logical database design, crucial when dealing with PDF document storage and related data․ First Normal Form (1NF) eliminates repeating groups within tables, ensuring each column contains atomic values – essential for efficient querying of PDF metadata like author or date․

Second Normal Form (2NF) builds upon 1NF, requiring all non-key attributes to be fully functionally dependent on the primary key․ This prevents redundancy when storing information about PDF versions or associated entities․

Finally, Third Normal Form (3NF) eliminates transitive dependencies, meaning non-key attributes shouldn’t depend on other non-key attributes․ Applying 3NF ensures data integrity when managing complex relationships between PDF files and other database elements, minimizing update anomalies and improving overall database stability․

Normalization, normalization, normalization is key!

Data Types and Their Selection

Choosing appropriate data types is fundamental to efficient PDF-focused database design․ For PDF metadata like file names and author names, VARCHAR or TEXT are suitable, accommodating varying string lengths․ Dates, such as creation or modification dates, should utilize DATE or DATETIME types for accurate storage and sorting;

Binary Large Objects (BLOBs) can store the PDF files themselves, though consider storing paths to files instead for performance․ Numeric data, like file size, requires INTEGER or FLOAT types․ Boolean values, indicating flags like ‘is_archived’, use BOOLEAN․

Careful selection prevents data corruption and optimizes query performance․ Consider the range and precision needed for each attribute when designing your schema, especially when dealing with potentially large PDF document collections․

Proper data typing is essential for a robust system․

Foreign Keys and Referential Integrity

Foreign keys are crucial for establishing relationships between tables in a PDF-centric database․ For example, a ‘Documents’ table might have a foreign key referencing a ‘Authors’ table, linking each PDF to its creator․ This enforces referential integrity, ensuring that relationships remain consistent․

When a PDF is deleted, cascading rules can automatically remove associated records in related tables, or prevent deletion if dependencies exist․ Properly defined foreign keys prevent orphaned records and maintain data accuracy․

Using ORMs can simplify foreign key management and automatically handle referential integrity constraints, reducing the risk of data inconsistencies․ Careful consideration of these relationships during the conceptual design phase is vital for a well-structured and reliable database system, especially when managing numerous PDF files;

Maintaining data consistency is paramount․

Phase 3: Physical Database Design

Choosing a DBMS and implementing indexing strategies are key for PDF storage performance․ Consider storage formats and file sizes for optimal database efficiency․

Choosing a Database Management System (DBMS)

Selecting the right DBMS is a pivotal step in physical database design, particularly when dealing with PDF documents․ Considerations extend beyond basic functionality to encompass scalability, security, and cost-effectiveness․

Relational DBMS options like PostgreSQL, MySQL, and Microsoft SQL Server are popular choices, offering robust features and established communities․ However, for large-scale PDF storage and retrieval, NoSQL databases like MongoDB might be considered due to their flexibility in handling unstructured data․

The chosen DBMS must efficiently manage binary large objects (BLOBs) – the typical format for storing PDF files․ Furthermore, the DBMS should support robust indexing mechanisms to facilitate quick searches within PDF metadata and potentially full-text content․ Evaluate the DBMS’s capabilities for handling concurrent access and ensuring data integrity, especially in a web application environment․

Ultimately, the best DBMS depends on the specific requirements of the application and the anticipated volume of PDF data․

Indexing Strategies for Performance

Indexing is crucial for optimizing database performance, especially when working with PDF documents․ Standard B-tree indexes are effective for metadata fields like author, date, and keywords, enabling rapid filtering and sorting․

However, searching within PDF content requires more sophisticated approaches․ Full-text indexing, supported by many DBMS systems, creates an index of the words contained within the PDF files themselves․ This allows for keyword searches across the entire document collection․

Consider using inverted indexes for full-text search, mapping words to the PDF documents containing them․ Partitioning indexes can also improve performance by dividing the index into smaller, more manageable segments․ Regularly analyze query patterns to identify opportunities for index optimization․

Proper indexing significantly reduces query response times, enhancing the user experience when retrieving and searching PDF documents․

Storage Considerations and File Formats (PDF Storage)

When storing PDF documents within a database, several options exist, each with trade-offs․ Storing PDF files directly in the database (as BLOBs – Binary Large Objects) simplifies management but can increase database size and potentially impact performance․

Alternatively, storing PDF files on a file system and referencing their paths in the database offers better scalability and performance․ This approach requires careful consideration of file system organization and backup strategies;

Compression techniques, like ZIP or specialized PDF compression algorithms, can reduce storage space․ Consider the implications of compression on retrieval speed․ Version control is vital; track changes to PDF files to maintain a history and enable rollback capabilities․

Choosing the right storage method depends on factors like PDF file size, access frequency, and overall system architecture․

Advanced Topics & Tools

ORMs streamline database interactions, while robust security practices, like preventing SQL injection, are paramount․ Explore resources and delve into transaction processing principles․

Object-Relational Mapping (ORMs) and Database Interaction

Object-Relational Mapping (ORMs) act as a crucial intermediary layer between your application code and the underlying database, simplifying database interactions significantly․

For web applications, ORMs can be particularly beneficial, handling common security concerns like SQL injection vulnerabilities automatically․ This trade-off comes with a slight reduction in speed and flexibility, as you’re bound by the ORM’s syntax rather than direct SQL․

However, if the primary goal is to learn SQL, relying heavily on an ORM might hinder that objective․ ORMs abstract away the SQL, potentially limiting your understanding of database mechanics․

Choosing whether to utilize an ORM depends on your project’s priorities: rapid development and security versus granular control and SQL mastery․ Careful consideration is key․

SQL Injection Prevention and Security Best Practices

SQL injection represents a significant security threat to database-driven applications, allowing attackers to manipulate database queries to gain unauthorized access or modify data․

Employing Object-Relational Mappers (ORMs) is a proactive step, as they often incorporate built-in protection against SQL injection by parameterizing queries and escaping user inputs․

However, even with ORMs, vigilance is crucial․ Always validate and sanitize user-provided data before it reaches the database layer, regardless of the abstraction level․

Implement the principle of least privilege, granting database users only the necessary permissions to perform their tasks․ Regularly audit database access logs for suspicious activity․

Staying informed about the latest security vulnerabilities and best practices is paramount for maintaining a secure database environment and protecting sensitive information․

Resources for Further Learning (Books & Websites)

For a deep understanding of relational theory and SQL, CJ Date’s “SQL and Relational Theory” and “Database Design and Relational Theory” are invaluable resources, offering a rigorous and comprehensive approach․

Use The Index, Luke (https://www․use-the-index-luke․com/) provides practical, day-to-day information and solutions to common database problems, presented in a less formal style․

To delve into the underlying mechanisms of database systems, “Principles of Transaction Processing” by Philip Bernstein is highly recommended, offering insights into transaction management․

For a classic perspective, explore Gray and Reuters’ “Transaction Processing,” though it may be less accessible for beginners․ These resources collectively provide a strong foundation for mastering database design principles․

CJ Date’s “SQL and Relational Theory” ー A Deep Dive

CJ Date’s “SQL and Relational Theory” isn’t merely a guide to the SQL language; it’s a foundational exploration of the relational model itself, the core principle underpinning modern database systems․

The book meticulously examines the theoretical underpinnings of relational algebra, providing a rigorous understanding of how data is structured and manipulated․ It challenges conventional SQL practices that deviate from pure relational principles․

Date’s work emphasizes the importance of data integrity, normalization, and avoiding common pitfalls in database design․ It’s a demanding read, requiring a commitment to understanding the mathematical basis of relational databases․

For those seeking a truly comprehensive grasp of database theory, and a critical perspective on SQL implementations, this book is essential reading, offering a depth rarely found elsewhere․

“Principles of Transaction Processing” ー Under the Covers

Philip Bernstein’s “Principles of Transaction Processing” delves into the intricate mechanisms that ensure data consistency and reliability within database systems, particularly crucial when dealing with PDF document storage and retrieval․

The book explores concepts like ACID properties (Atomicity, Consistency, Isolation, Durability) in detail, explaining how these principles are implemented to manage concurrent access and prevent data corruption․

It covers recovery techniques, concurrency control methods, and the challenges of distributed transaction processing, offering a deep understanding of the “under the covers” operations that maintain database integrity․

For developers and database administrators aiming to build robust and scalable applications, this text provides invaluable insights into the complexities of transaction management and its impact on overall system performance․

PDF-Specific Database Design Challenges

Storing PDF metadata, enabling full-text search within documents, and implementing robust version control present unique hurdles for database schema design and management․

Storing PDF Metadata (Author, Date, Keywords)

Efficiently storing PDF metadata – encompassing author information, creation and modification dates, and relevant keywords – is paramount for effective document management within a database system․

Dedicated database fields should be allocated for each metadata element, utilizing appropriate data types (e․g․, VARCHAR for author and keywords, DATETIME for dates)․ Consider indexing these fields to accelerate search queries․

Furthermore, a normalized approach is beneficial; for instance, maintaining separate tables for authors and keywords, linked to the PDF records via foreign keys, avoids redundancy and ensures data consistency․

Careful consideration should be given to handling potentially lengthy keyword lists and accommodating variations in metadata availability across different PDF documents․ Consistent metadata extraction processes are also crucial for data quality․

Full-Text Search within PDF Documents

Implementing full-text search capabilities for PDF documents stored within a database necessitates a strategic approach beyond simply storing the files themselves․ Direct searching within PDF binaries is inefficient; instead, the text content must be extracted and indexed․

Several techniques exist, including utilizing dedicated full-text search engines (like Apache Lucene or Elasticsearch) integrated with the database, or leveraging database-specific full-text indexing features․

The chosen method should account for PDF complexities such as varying text encodings, image-based text, and document structure․ Regular re-indexing is vital to reflect updates to the PDF content․

Consider stemming and stop-word removal during indexing to improve search relevance․ Performance optimization, including appropriate indexing strategies, is crucial for handling large volumes of PDF documents and ensuring rapid search response times․

Version Control for PDF Files in the Database

Maintaining version control for PDF files stored in a database is critical for audit trails, recovery from errors, and tracking document evolution․ Simply overwriting the existing PDF with a new version loses historical data․

Several strategies can be employed․ One approach involves storing each PDF version as a new record in the database, linked to the original document via a version number or timestamp․ Another utilizes a binary large object (BLOB) field, updating it with each revision․

Implementing a robust versioning system requires careful consideration of storage costs and query performance․ Efficient indexing and archiving of older versions are essential․

Consider integrating with established version control systems, or developing a custom solution tailored to the specific application requirements, ensuring data integrity and traceability throughout the PDF lifecycle․